-
How to Attract Hummingbirds To Your Home
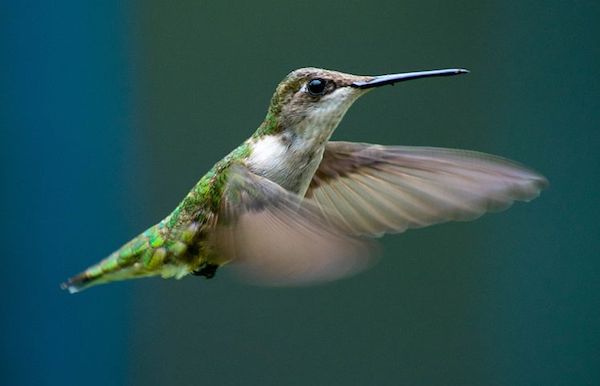
If there were a bird olympics, hummingbirds would capture every gold medal. Hummingbirds are little miracles. They are superheroes in tiny bodies. They can flap their wings 80 times per second and can fly in all directions, including backwards and upside down. They can fly up to 30 miles per hour and up to 60 miles per hour in a dive. They are also smart, sweet, and sociable. I just love them.
Here on the farm, I wake up every morning not only to the crowing of my rooster, but also the whirring wings and cheery chatter of dozens of hummingbirds. I never tire of watching them at the feeders I have hanging outside my home. It is very easy to attract hummingbirds. Here are a few great tips that will entice these tiny wonders to your home.
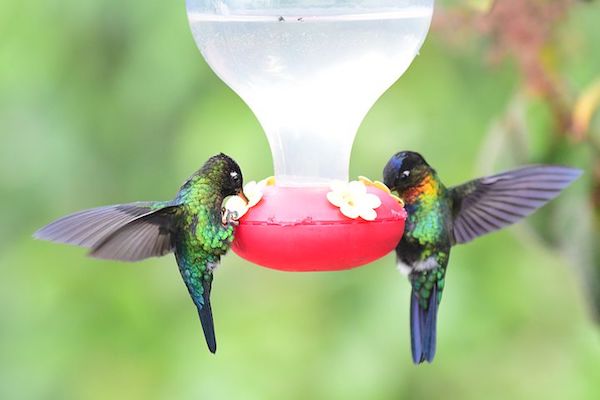
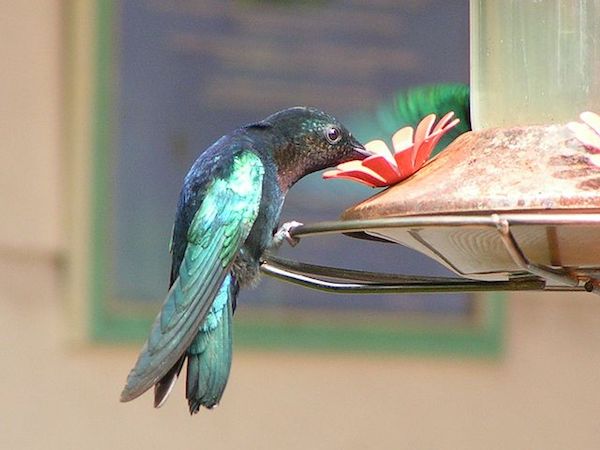
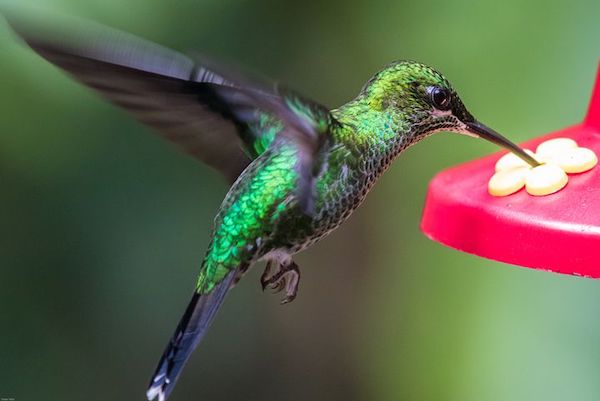
Hang Hummingbird Feeders
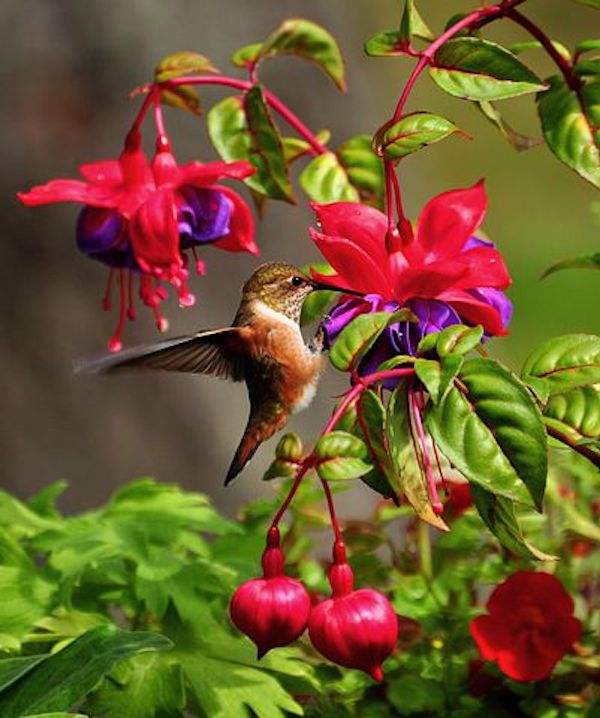
Nectar is the primary food for hummingbirds and they need it almost continuously throughout the day. Nectar supplies fast energy to the hummingbird’s diet. The feeder should be where you can watch it, but also close to trees or shrubs where they can perch inbetween feeding. It should be in a shaded area to keep the nectar fresh longer. I have also found that my hummingbirds seem to be partial to one of the feeders I have that also has a perch around it so they can sit while they are consuming their nectar.
Use Easy Homemade Nectar in Your Feeder
Make your own easy organic nectar. Do not buy the stuff from the store with food coloring in it! While hummingbirds are attracted to the color red, the consequences of consuming red dye may pose potential health risks and is completely unnecessary.
Simple Nectar Recipe: Use 4 cups water and 1 cup sugar. Mix the two ingredients well and heat on stove until mixture comes to a boil. Boil 1-2 minutes. Remove from heat and cool before filling feeders. Never add anything but these two ingredients (and that includes artificial sweeteners and honey).
Keep Feeders Squeaky Clean
Clean your feeders well and regularly. Your nectar should last at least a week in the shade, but in cooler areas may last a bit longer. If it has been two weeks, whether they are empty or not, take them down and wash the shenanigans out of them. In particular, the little flowers over the feeding holes need to be cleaned carefully as they can build up toxic mold. I use bleach to clean mine and use chopsticks to clean the flowers. I then do a double and triple rinse to ensure all the bleach is removed. If you don’t feel comfortable using bleach because you don’t want to do all that rinsing, you can use 1 part vinegar and 4 parts water to clean your feeders. The primary goal is to kill all the toxic mold and bacteria.
Use More Than One Feeder For Best Results
To attract the most hummingbirds, try to have more than just one feeder, and place them at a distance. This will help prevent hummingbirds from fighting over food.
Plant Flowers That Attract Hummingbirds
Plant things around your home that hummingbirds love. Before I moved to my farm, I lived in a very small apartment. There were tons of bottlebrush trees behind it which were always filled with hummingbirds. Here at the farm, they love my hanging fuschia, petunias, plumbago flowers, zinnias, and also many of my succulent flowers. Other plants that attract hummingbirds are bee balm, honeysuckle, trumpet vine, cardinal flower, sage, rhododendron, columbine, butterfly bush, lupine, bleeding hearts, and any native red or orange tubular flowers.
Avoid Pesticides
Never use pesticides. Besides nectar from flowers, hummingbirds also eat spiders and other small insects.
Make Water Available
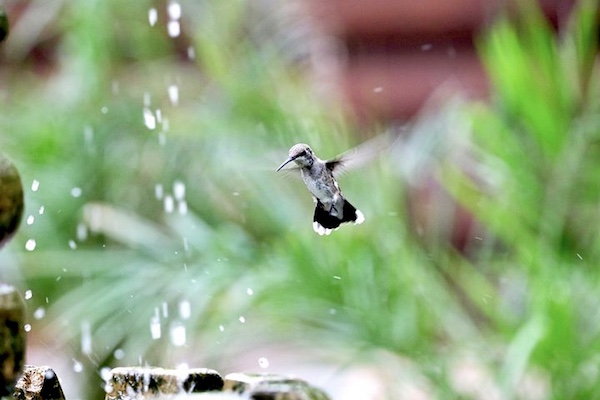
Hummingbirds are super clean and like to bathe frequently. Make water available via either a fountain or misting device. Hummingbirds also love sprinklers. Every time I turn mine on in the evening, I am guaranteed one or more of my little friends will come to play in the water.
Helpful Tips:
- Sugar/water nectar can be stored in the frig for up to 3 weeks.
- Use only feeders that are easy to clean. If you can’t reach inside or use a tool to get in and clean every nook and cranny, it is no bueno.
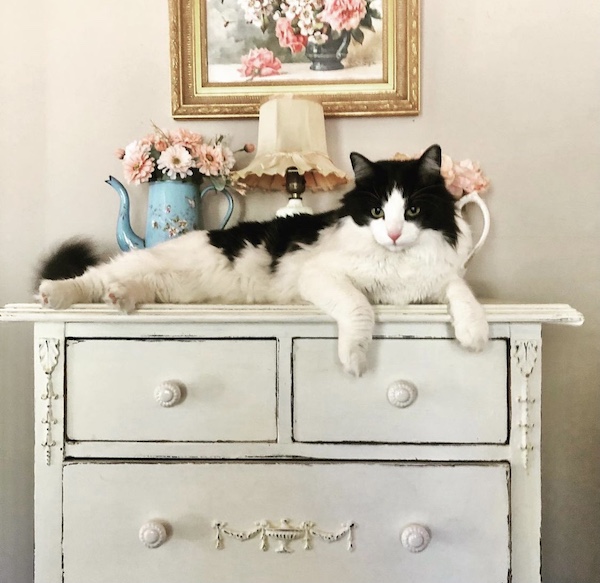
- Place feeders in areas where animals such as cats will be unable to reach them.
For more information on hummingbirds, see Audubon. You may also enjoy Add Charm to your Garden with Beautiful Birdhouses! and The Bluebird of Happiness. Thank you for visiting my blog. Wishing you peace, love, happiness, & beautiful vistas.
-
How to Save Money with a Clothesline
Years ago, using a clothesline, drying rack or even bushes to dry clothing was the only method available. Today we have become used to drying our clothes in dryers. It’s easy and convenient. But it also uses unnecessary energy and costs more than you may think. Using a dryer can cost you over a hundred dollars per year, depending on how much laundry you do. You can find out exactly how much it costs to run your electric dryer by multiplying your dryer’s wattage by the length of run time in hours and dividing by 1000. Multiply this number by your cost per kilowatt on your electric bill. Then multiply the number of monthly loads you do to determine your monthly cost for using your dryer. Gas dryers cost on average 11 cents per hour plus 12 cents per hour for electricity to power the drum. Here are some great options for skipping the dryer and saving money.
Source: Pinterest Old Fashioned Clothesline
I have been hanging clothes on the clothesline since my three boys were little shavers. Back then, we lived in an old Victorian home that had a huge clothesline I just loved. It was approximately twenty feet long with four lines which were always completely filled when I did laundry!
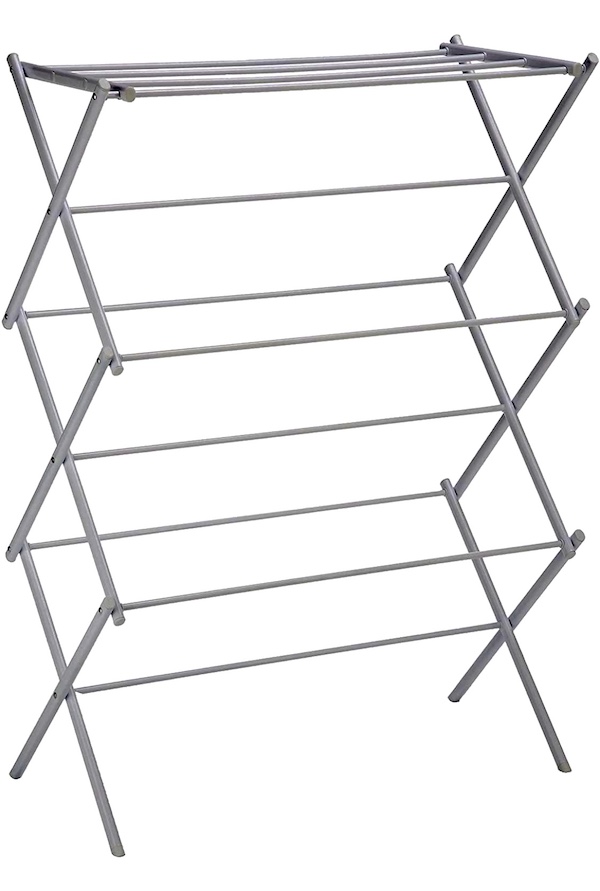
Available at amazon.com, this collapsible rack can also be used to dry herbs. Drying Racks
Even if you live in a tiny apartment, like I once did, you can use a drying rack like this one from Amazon. You can even use your shower curtain rod to hang clothes to dry!
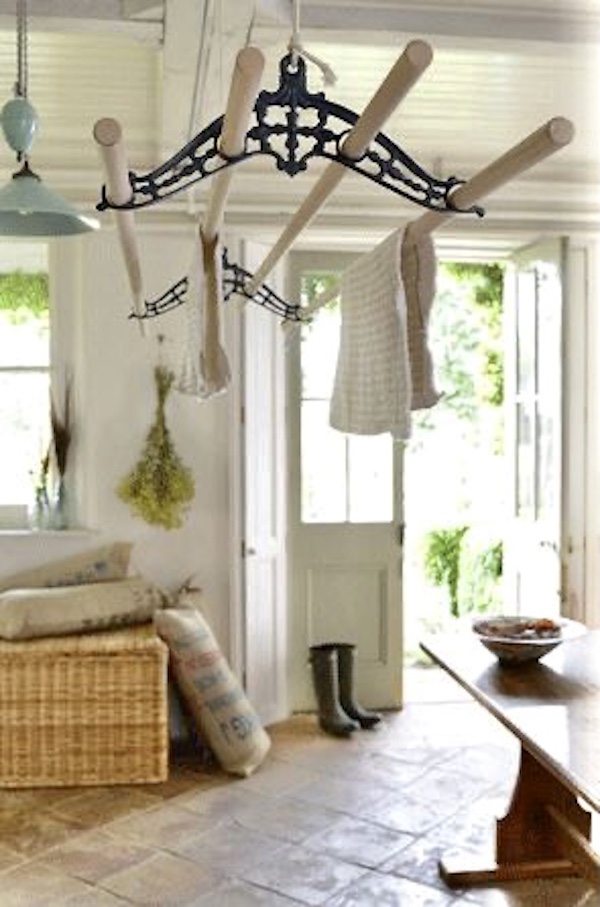
Elgan Clothes Airer available at pulleymaid.com. Overhead Clothing Airer
Another option for drying laundry naturally is the overhead clothing airer. These originated in Europe back in the 1700s. They were built using a pulley system that lowers for your laundry items, then raises back up towards the ceiling where the home’s warmest air helps the drying process. They have recently become quite popular again. For a tutorial on building your own, see the Grit and Polish.
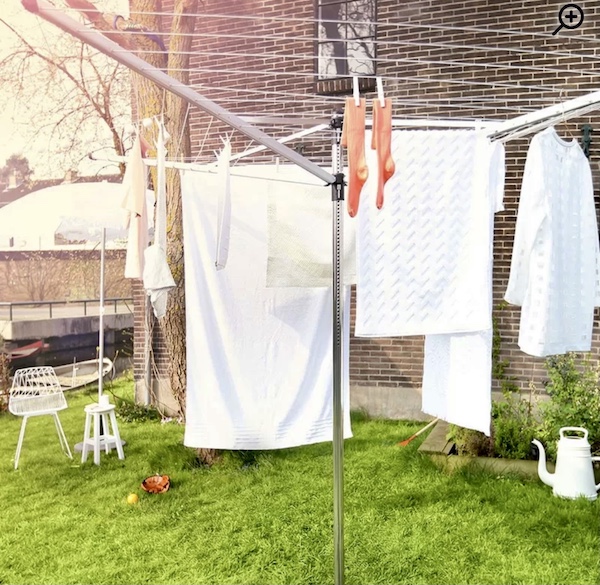
Rotary clothesline available at wayfair.com Clothesline Benefits
Benefits of hanging clothes vs. using a dryer are that they smell cleaner and fresher from being outdoors in the sunshine. You save on wear and tear from them being tumbled around and beat up in the dryer. You also avoid the “pilling” that occurs on items put in the dryer. Also, many clothing items such as blouses and sweaters are line dry only, and will inevitably shrink if you put them in the dryer. Reducing our drain on the planet’s energy is also beneficial. What I like most about hanging clothes on the clothesline is that it is relaxing. You have time to engage in a simple, repetitive activity that can actually be quite calming. I also like that you can sort the laundry as you hang it, pairing socks, etc. so there is no maddening struggle to match things up later. As an occupational therapist, I have used hanging laundry on a clothesline as a therapeutic activity in skilled nursing facilities. It is a great activity to work on fine and gross motor skills, eye hand coordination, and balance.
Helpful Tips
- To avoid wrinkles, always shake out wrinkle prone items a few times before hanging them on the clothesline. (Thanks to my Aunt Barb who taught me this many years ago!)
- When removing dry clothes from an outdoor clothesline, always give them a good shake before folding them. Years ago, I had folded a pair of my son’s jeans and was putting them in his drawer when I heard a buzzing sound. Lo and behold, I discovered a bumble bee inside his pants, which could have led to a most painful and unpleasant experience. Thankfully, this is a pretty uncommon occurrence, but one best to avoid.
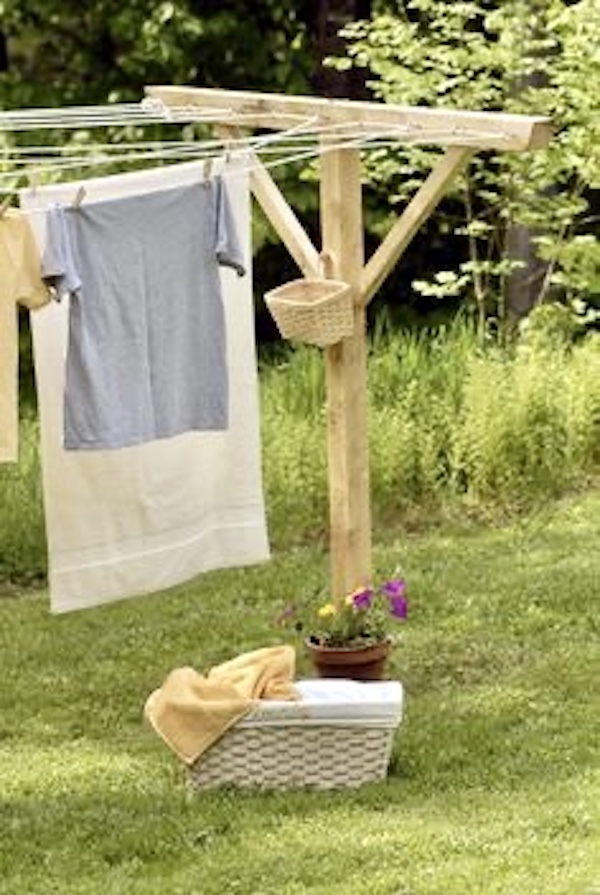
- You don’t have to get fancy. You can purchase cheap, simple clotheslines at any hardware store. At my current home, the clothesline is strung between the posts on my back porch, and I have clothes drying racks as well.
Thank you for visiting my blog! You may also enjoy The Very Best Soothing Summer Herbal Teas and The Most Beautiful Instagrammable Spots in Monterey! Wishing you peace, love, happiness, and beautiful vistas.
-
Get Super Healthy Hair With Herbal Vinegar!

If you’re like me, you are probably tired of shelling out tons of money for shampoo and conditioner. How about trying to figure out what to buy? Then there are the ingredients. Have you ever looked at what they are putting in those expensive hair products? Lots of creepy chemicals, many I can’t even pronounce. Sadly, many commercial hair products often do the opposite of what they are supposed to do. Instead of helping your hair, the harsh chemicals they contain often damage it. Did you know you can get healthy hair naturally for just pennies? Herbal vinegar helps return your hair’s health by removing dirt and yucky buildup. What’s more, most experts agree that vinegar is safe for all hair types, including color-treated hair. Follow this simple tutorial for the most happy, healthy hair ever!

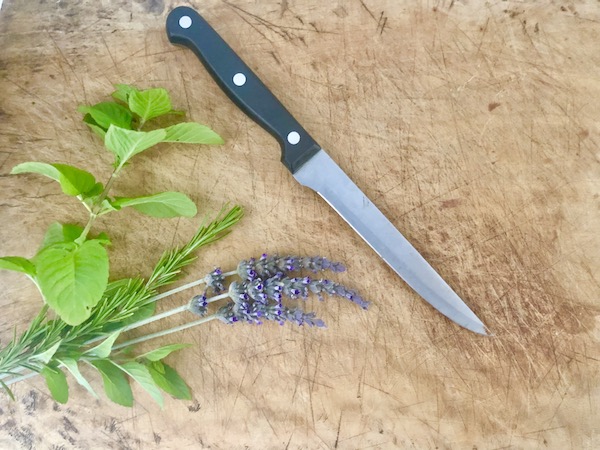
Step One: Gather Supplies
You will need at least two cups of organic vinegar, a cutting board and chopping knife, and a large jar or crock with a lid.
Step Two: Choose Herbs for Herbal Vinegar
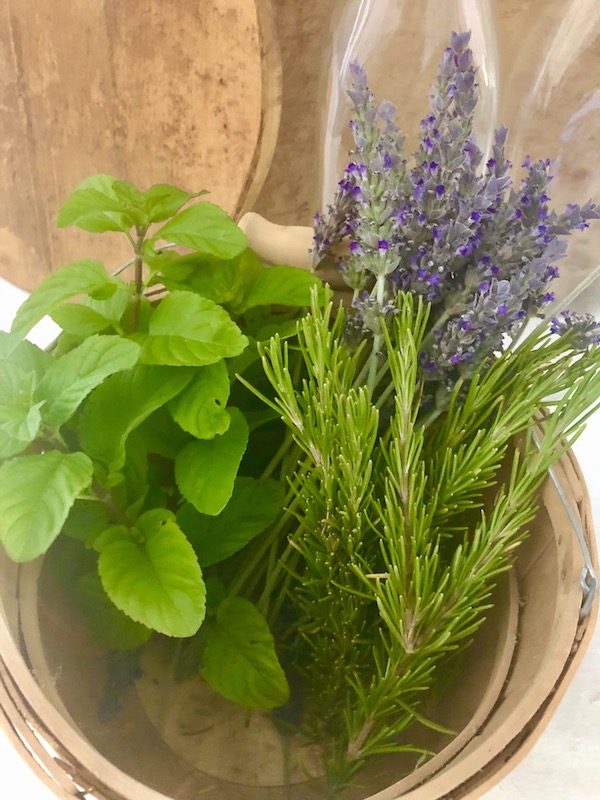
For my herbal vinegar, I chose lavender, rosemary, bergamot and peppermint which I have growing at my farm. You can choose anything that is organic and pesticide free, there are no hard or fast rules.
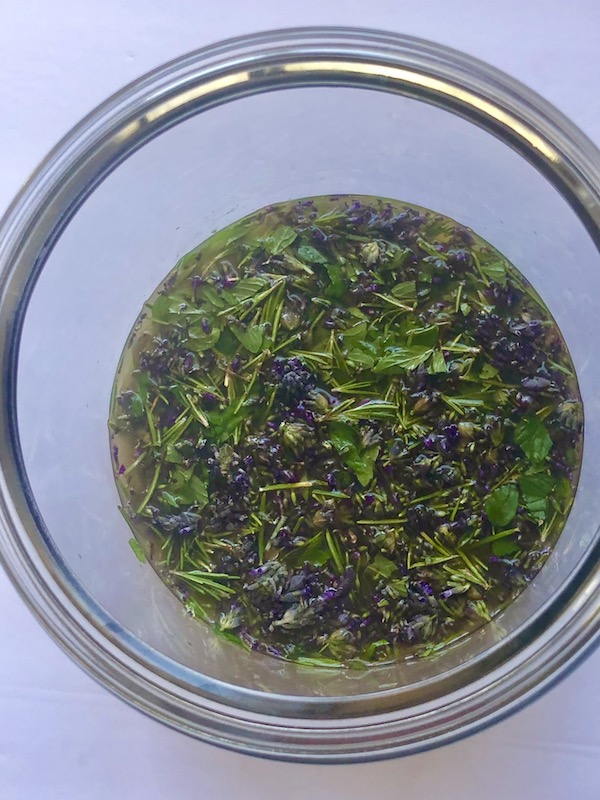
Step Three: Make The Herbal Rinse
This is the fun part. Chop the herbs on your cutting board so that you have approximately one cup. Put this into the jar. Add about two cups of vinegar, making sure that it covers the herbs. Stir thoroughly, and then put on the lid. That’s it! Let your herbal hair potion rest for at least two weeks.
Step Four: Strain the Herbs
This is the important part. Use a mesh strainer to remove the herbs from the vinegar. What is left is a concentrate of all those beautiful herbs!
Step Five: Dilute
You need to dilute this concentrated vinegar by adding an equal amount of water. For example, if you end up with two cups of vinegar, you will add two cups of water to it. Finally, it’s done! Apply the rinse to dry or wet hair for at least 3-5 minutes, making sure to gently massage into the scalp. If you want to condition your hair, you can also add a tiny bit of jojoba or coconut oil, no more than 1/4 tsp. Rinse hair well with warm water until clean.
Use your herbal vinegar in place of your shampoo. You will be amazed at how clean your scalp feels and how soft and shiny your hair looks. And best of all, it is safe, organic and is not hurting the earth. For more information on how to use flowers and herbs, check out The Aromatherapy Garden by Kathi Keville. This author is simply amazing, and if you love gardening it is chock-full of information. You may also enjoy checking out some of the best herbs for your hair by Minaz at Hair Buddha. Other posts you may enjoy include My Favorite Herbs and Soothing Summer Herbal Teas.
Thank you for visiting my blog! Wishing you peace, love, happiness, & beautiful vistas!
-
5 Super Easy Ways to Use Up Eggs
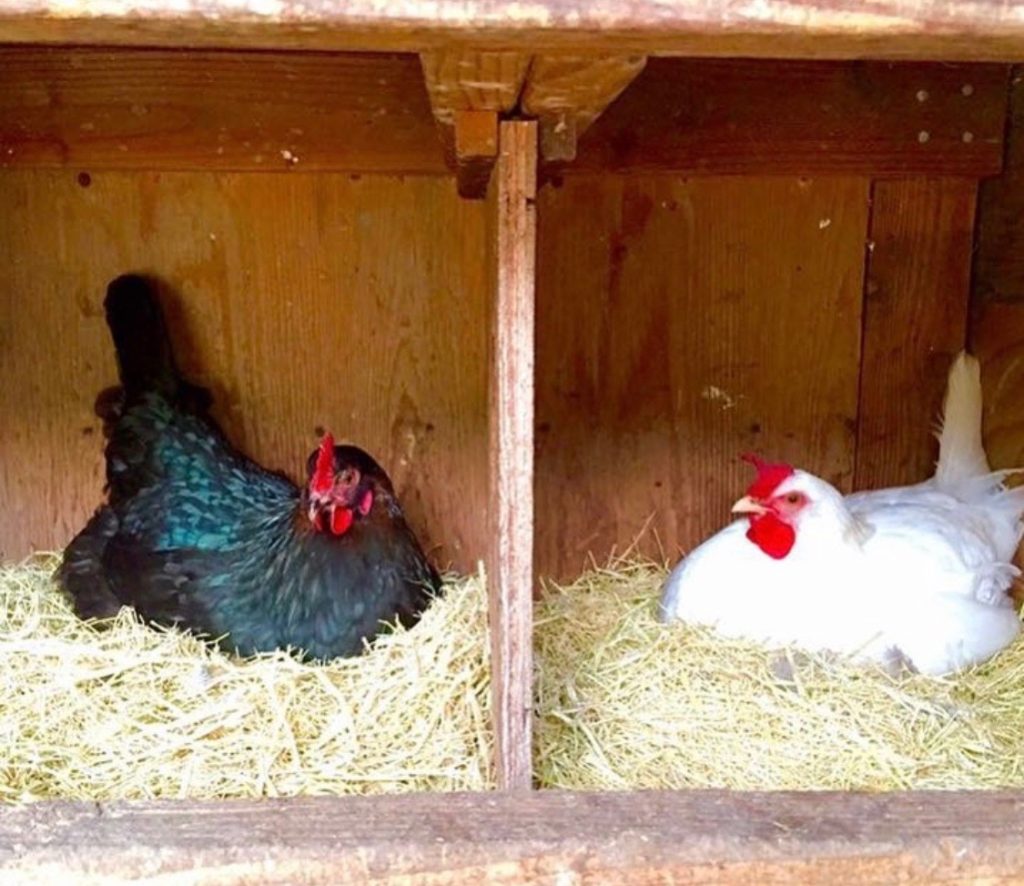
As all of us chicken parents know, summer is the height of egg production. Longer days with more sunlight start those hens a-laying. This can lead to having a big stockpile. Giving eggs to friends, family & neighbors helps, but what to do with the rest? Here are some easy tips for using up those extra summer eggs.

1. Recipes to Use Them UP!
Egg salad, potato salad, noodles, custards, French toast, lemon curd, quiche, and frittata are all dishes requiring lots of eggs. Deviled, fried, scrambled, or poached, there are endless possibilities.
2. Freeze Without The Shell
You can’t freeze them in the shell, but you can freeze the insides. To freeze, crack yolks and whites into a bowl and mix briefly, then pour into ice cube trays. If you want to keep the whites and yolks separated you can do this too. Whites don’t need to be beaten, but yolks do and will require the addition of 1/2 tsp. salt OR 1 and 1/2 tsp. sugar for each cup of yolks, so decide if you will be using them for savory or sweet (and don’t forget to label which they are!) Once frozen, you can remove and place in a freezer appropriate storage container.
3. Freeze The Yolks
Freeze hard boiled yolks. You can’t freeze hard boiled whites or they will be rubbery and unappetizing. The easiest way to do this is to separate the white from the yolk, then drop the yolks in a pan of water so they are just covered. Bring the water to a boil, then remove the pan from heat and let stand 10-15 minutes. Drain the water and voila! The yolks are ready to freeze.
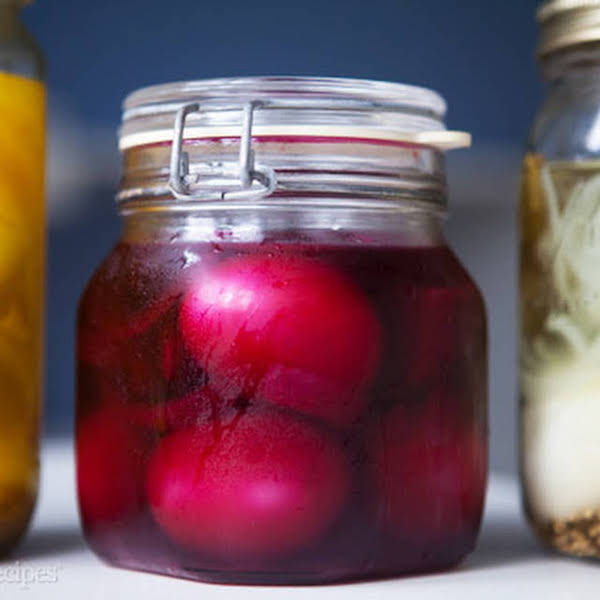
Source: Yummly 4. Pickle Them
Make pickled eggs. These are hard-boiled eggs cured in a brine. This was a technique used before refrigeration. My friend Jaclyn made some and brought them to work once for us to try, and they were delicious as well as super pretty. Here is a great recipe for pickled eggs.
5. Give Them to Your Critters
Feed them to your pets! Cooked eggs can be fed to your dog, chickens, cats, etc. Eggs are an excellent source of protein, calcium, iron, B vitamins and amino acids. Never give raw eggs to animals due to risk for bacterial poisoning. Feeding raw could also interfere with absorption of vitamin B. Always check with your veterinarian prior to giving them to fur babies if you suspect allergies. My German Shepherd, cats and chickens love them!
Helpful Tips:
- Always label stored eggs so you know when you first stored or froze them. Include added ingredients, such as salt or sugar.
- You can freeze eggs for up to a year.
- Always thaw frozen eggs in the refrigerator; never attempt to cook them straight from the freezer.
- For recipes, 3 Tablespoons of thawed raw egg = 1 egg.
- Never go into the chicken coop barefoot!

Thank you for visiting my blog! You may also like Rare Chicken Breeds and Common Chicken Sayings. Wishing you peace, love, happiness, & beautiful vistas.
-
Top 10 Free Things to Do in Monterey

Planning your visit to the Monterey area but dreading the cost? Need some budget friendly options? While it is true that many things are costly here, there are also tons of super fun activities that are completely free. And what could be better than that? Here is my list of the top ten free things to do in Monterey.
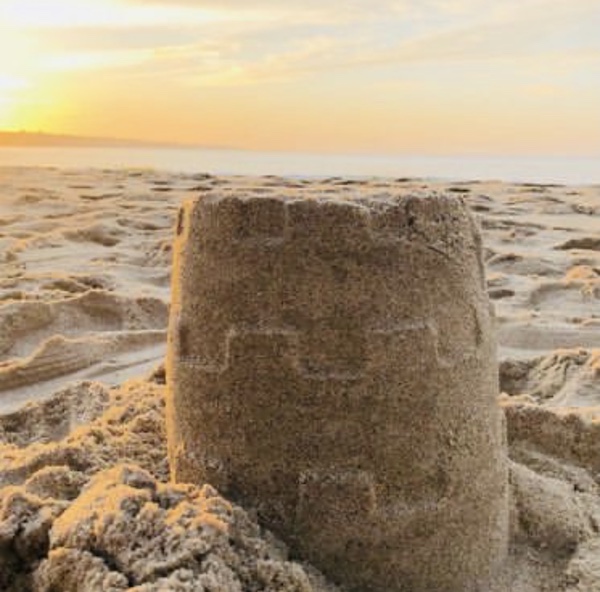
Free Beaches
Bring your beachitude because sand, sun, and water await. Take your pick of beaches: Delmonte, Mcabee, San Carlos, Breakwater Cove, Lovers Point, Asilomar, Carmel, Carmel River, and the list goes on and on. Find treasures in tide pools, build sandcastles, fly a kite, watch surfers, scuba divers, paddle boarders and kayakers, or catch a glimpse of pelicans and harbor seals. You may even spot a dolphin or whale! If you choose Asilomar Beach, you may also want to check out nearby Point Pinos Lighthouse. Located at the corner of Asilomar and Lighthouse in Pacific Grove, the lighthouse is currently closed to visitors, but you can still view it from afar.


The beginning (or end) of the trail at Lovers Point in Pacific Grove. Free Recreation Trail
Walk, run or bike next to the beauty of the ocean on the fantastic Monterey Bay Coastal Recreation Trail. This wide paved trail follows the old abandoned Southern Pacific railroad line and passes by or through all the tourist hot spots including Cannery Row and Fisherman’s Wharf. You will also have many views of and access to several beaches. My favorite part is between Monterey and Seaside, when you pass through a canopy of heavenly scented eucalyptus trees. The trail stretches for 18 miles from Lovers Point to Castroville. Dogs on leash are welcome. For more information, see rec trail.
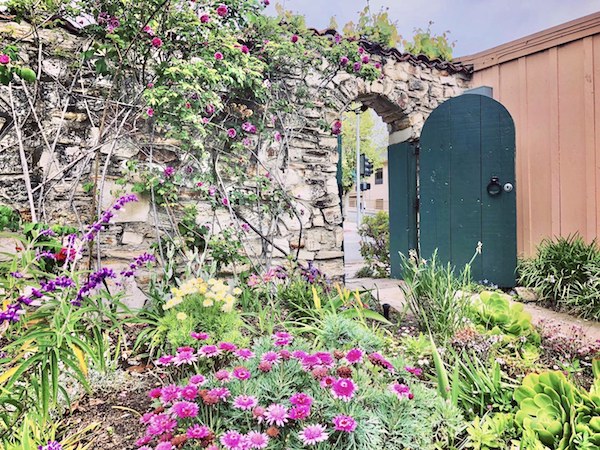
Free Secret Gardens
Visit the secret gardens scattered throughout old Monterey. Peaceful and serene, these walled gardens are sure to delight, and many have benches where you can sit and read a book, enjoy a picnic, or simply contemplate the beauty around you.

Free Farmer’s Markets
Check out local farmer’s markets. There are Farmer’s Markets every day of the week here! My favorite is the one on Alvarado in old Monterey on Tuesdays. Three blocks are closed off to allow tons of vendors selling fresh fruits and vegetables, crafts, yummy food and more. For more information, see local farmer’s markets.

Free Picnics
Enjoy a romantic picnic with your love(s). Check out my list of the Ten Best Picnic Spots in the area.

Haunted Hall & Jail
Visit a spooky jail and courthouse where people were hanged outside on the balcony. Built in 1849 in the Greek Revival Style, Colton Hall has a colorful history. It was named after Walter Colton, who was mayor, coroner, judge, and sheriff (in addition to other titles) from 1846-1849. In 1854, a jail was built next to it. It’s said that no one ever escaped from the jail due to its thick granite walls. Those convicted to death were hung by a rope over the balcony on the second floor. While there are thankfully no longer any hangings at Colton Hall, there is a free history museum, located on the second floor. There you can learn about how California became a state here, and see a copy of the original constitution. For more information, see Colton Hall and Old Monterey Jail.

Tool Around Town on a Trolley For Free
Save money on parking, avoid traffic congestion, and escape a potential parking ticket by taking the trolley. Completely free, the MST trolley operates July 3rd through September 6th, 10 am to 6 pm daily. Sites it visits are downtown Monterey, the Monterey Bay Aquarium, Cannery Row and Fisherman’s Wharf. For more information including schedule and departure/drop-off sites, see Monterey Trolley.

Clam It Up
Sample scrumptious clam chowder at Fisherman’s Wharf…for free! There is nothing like the taste of clam chowder here. Perhaps it is the backdrop of the cool ocean breeze, the cacophony of crying seagulls and barking sea lions, and the colorful boats bobbing in the harbor. Whatever makes it taste so good, I don’t know, but Monterey clam chowder is simply magical.

Happiness is a Hike
Drink in all the natural beauty the area has to offer by going for a hike. Check out the twelve best places to hike in Monterey County!

Butterflies Are Free
A must-see, the Monarch Butterfly Sanctuary is located in nearby Pacific Grove, called PG by locals. Thousands of monarch butterflies overwinter here on the Monterey pines and eucalyptus trees from October through March. This has given PG the moniker “Butterfly Town”. Butterflies are free to fly, and so are you. No wings or cha-things required. For more information, see Sanctuary.
.

I hope you enjoyed learning about all the fun things to do in the Monterey area for free. Because the best things in life are indeed free. You may also enjoy Delicious Places to Eat in Monterey on a Budget. Thank you for visiting my blog. Wishing you peace, love, happiness & beautiful vistas!
-
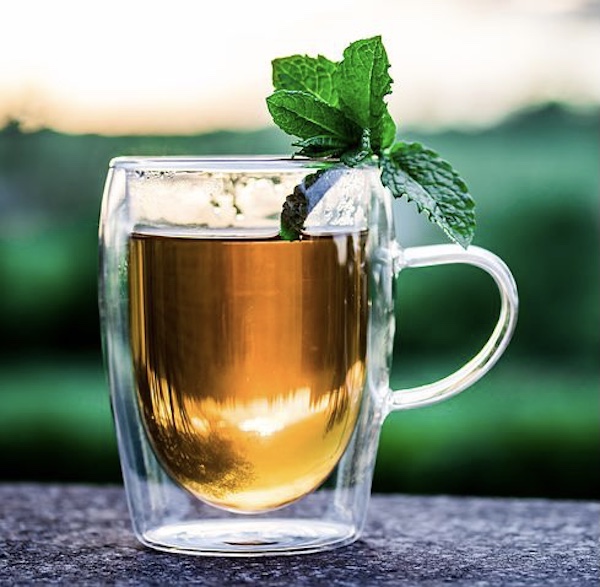
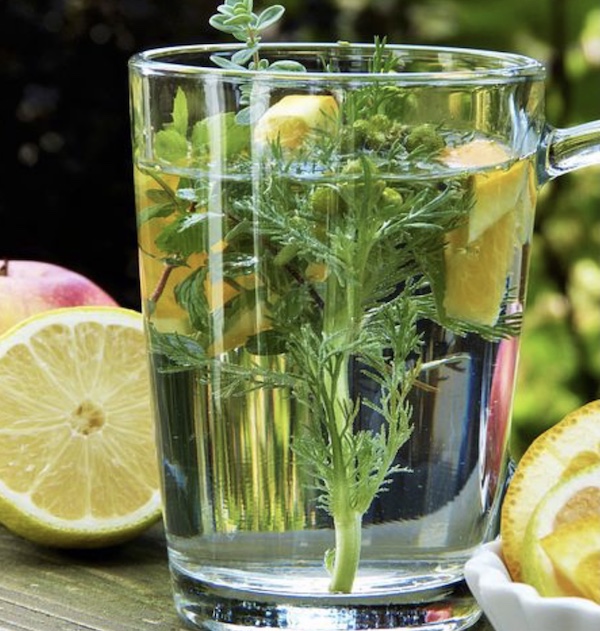
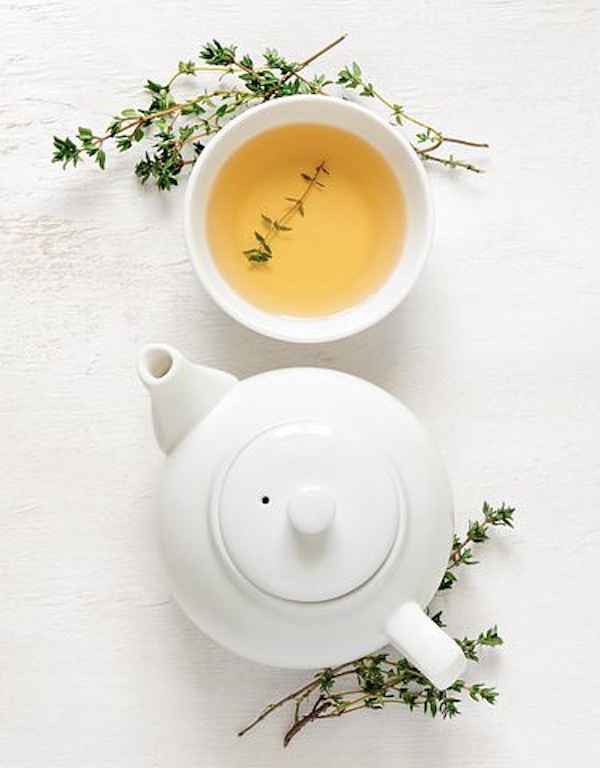
The Very Best Soothing Summer Herbal Teas
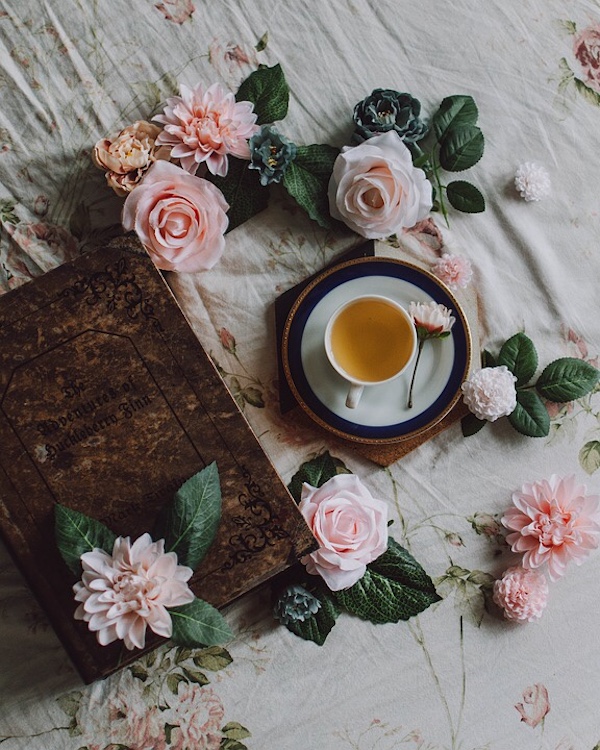
Have you planted herbs that are going growing like crazy now? Or maybe you picked up a bunch of herbs at the farmer’s market and are wondering what to do with them all? Herbal teas are a great way to use them. A cup of tea is one of life’s greatest comforts, and herbal tea can help you stay hydrated and healthy. Many herbs contain vitamins and antioxidants that help strengthen our immune systems and give us energy. They may also have essential oils, minerals and fiber that contribute to overall well-being. Here are some great ways to use those herbs to create homemade teas to help heal your mind and body. The best part is that unlike regular tea, there is NO caffeine. Each recipe is for one cup of herbal tea. For each recipe, pour boiling water over the herbs and steep for 8-10 minutes. The final step? Strain the herbs, and enjoy!
Peppermint Basil Potion
Peppermint tea is often used for soothing heartburn and tummy troubles. Basil is clean and refreshing. Use two teaspoons of chopped peppermint leaves and 4-5 basil leaves.
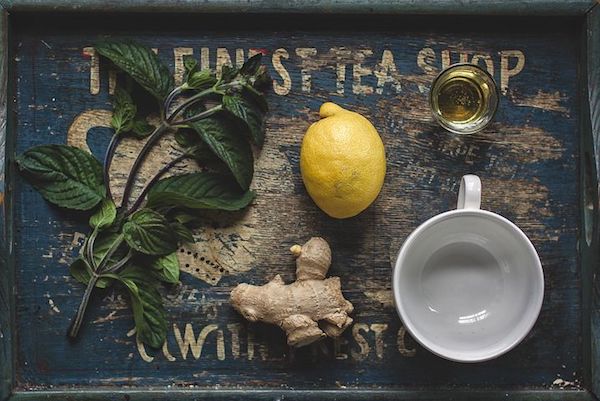
Ginger Hugs Tea
This tea is useful for stuffy colds and also brings energy and healing. Use a teaspoon of fresh ginger, a teaspoon of chopped mint, and a squeeze of lemon. You can add honey to sweeten it if desired.
Smarty Pants
Smarty pants tea may assist with sharpening memory and concentration. Use 1/2 teaspoon rosemary leaves and 2 teaspoons chopped spearmint.
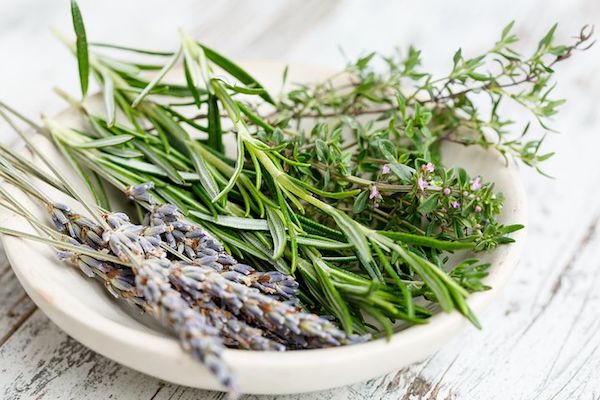
Love & Peace
This tea is great to drink when you are feeling bummed out or overwhelmed. Use a teaspoon of lavender, a teaspoon of jasmine flowers, and 1 cinnamon stick. Use only Jasminum species such as J. officinale, J. sambac, or J. polyanthum. Pick the flowers during the warmth of the day when the dew has dried, as buds or freshly opened flowers. Lavender relaxes the body and decreases anxiety. Jasmine has anti-inflammatory properties and reduces stress. Both scents are known to induce calm. Cinnamon is known to increase mental focus and help upset stomachs. The scent of this tea is heavenly.
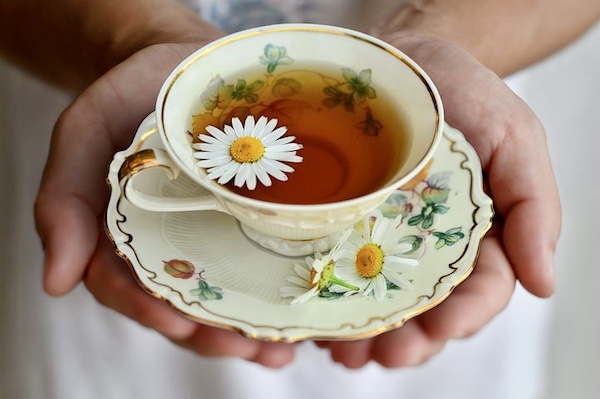
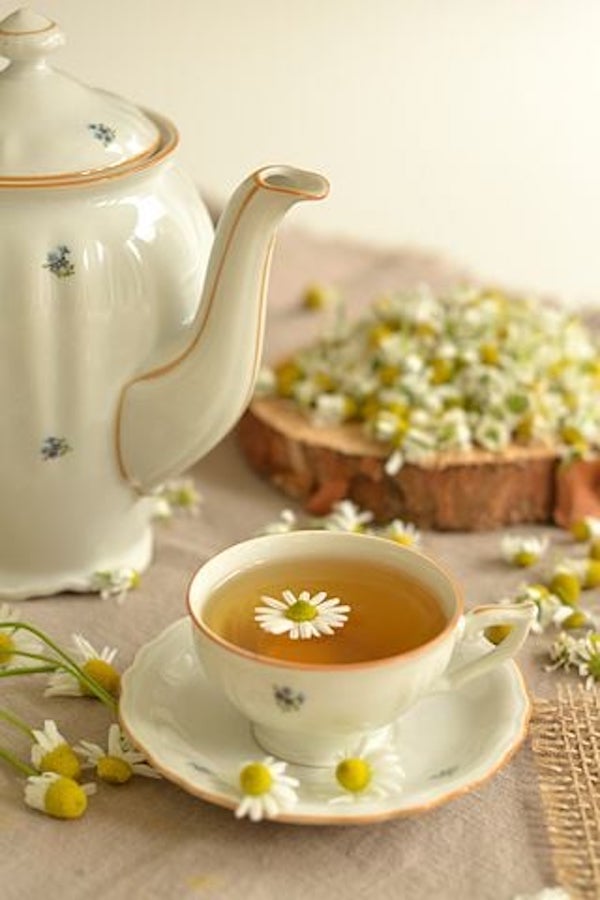
Calming Chamomile
Another calming tea, chamomile is known to reduce stress and tension as well as fight bacteria. It can also improve digestion. It has a fruity, apple-like flavor. Use two teaspoons of chamomile flowers.
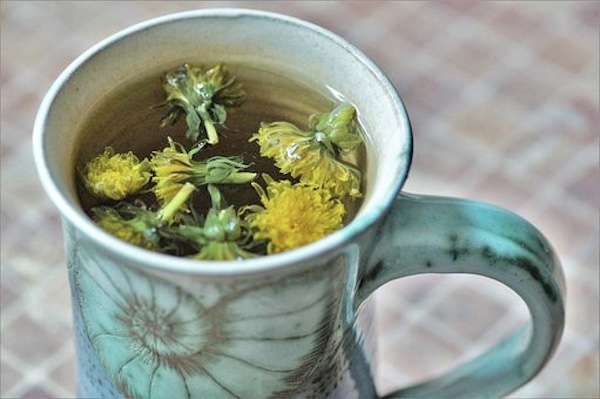
Delicious Dandelion
Dandelions are rich in vitamin K which helps prevent blood clots, and calcium which helps maintain bone health. It is also high in vitamin C and antioxidants, which help your body detoxify. Do not drink dandelion tea if you are allergic to ragweed and related plants as it may cause an adverse allergic reaction. It also interferes with the absorption of many common antibiotics. Do not drink dandelion tea if you are taking antibiotics. If you have discussed this with your physician and have been given approval as to its safety, use two to three teaspoons of dandelion flowers.
Fabulous Fennel Tea
The licorice flavor of fennel infuses this tea, and helps with digestion. Use a teaspoon of fennel seeds or several fennel leaves.
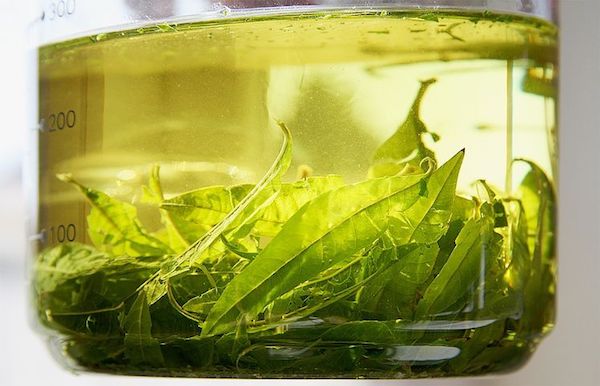
Luscious Lemon Verbena
Zesty and refreshing, this tea can also aid health including digestion and pain. Add one to two teaspoons of chopped or torn leaves to your cup.
Ravishing Rosemary Thyme
Bold and invigorating, this tea will give you a pop of invigoration. For one cup use one teaspoon rosemary leaves and two teaspoons lemon thyme leaves. You may add honey if it’s a little too strong.
Helpful Tips
- You can experiment with combining herbs you like to create your own unique concoction; just remember that the longer you steep your herbs, the stronger the flavor will be.
- When in doubt, don’t add too many herbs at the start. You can always add more, but you can’t add less!
- Use only organic, pesticide-free and chemical fertilizer-free herbs & flowers.
- You can substitute dried herbs for fresh, but the steep time will be shorter, usually only 3-4 minutes.
- Always talk to your physician and get approval before consuming any herbal tea to ensure your safety. Some herbs may interfere with medications you are taking, or may be dangerous due to possible health issues you may have.
Thank you for visiting my blog. You may also enjoy Nine Best Fresh Herbs To Use In Your Kitchen and 23 Yummiest Gluten Free Foods at Trader Joe’s. Wishing you peace, love, happiness, and beautiful vistas!