-
Rare Chickens: Beautiful & Healthy Eggs
When you raise your own chickens, you gain peace of mind knowing exactly where your eggs came from. Organic and free-range eggs contain higher levels of Omega-3 fatty acids, beta carotene, Vitamin E, and Vitamin A. They are also lower in saturated fat and cholesterol than conventional, store-bought eggs.
When I first moved to my farm, raising my own chickens was a priority. I could not wait for my first eggs to arrive. I started out with your average, run-of-the-mill chickens such as Leghorns and Australorps from the local farm supply store, but soon I became fascinated by the more rare, heritage breeds, especially those that laid eggs in novel colors. I now focus on raising the following breeds:
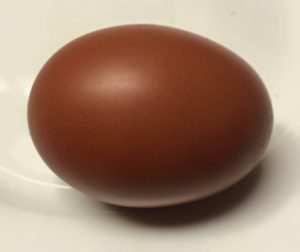
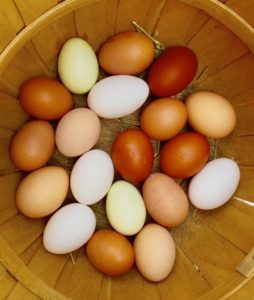
- French Marans. French Marans lay deep chocolate brown colored eggs, that when cracked open reveal a bright orange, yolk, bursting with vitamins, protein, and fats from its healthy lifestyle. Marans have the reputation for laying the best-tasting chicken egg in the world. (Perhaps, for these reasons, the author Ian Fleming identified Marans eggs as those most preferred by James Bond.) I raise ultra-rare Birchen Marans. My Marans are extremely docile and sweet.
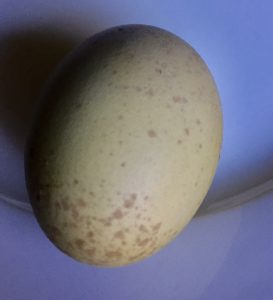
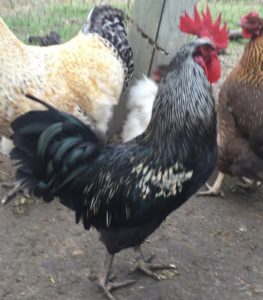
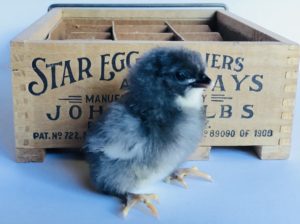
2. Swedish Isbars. Swedish Isbars are thrifty foragers that will produce 150-200 green eggs a year. The eggs vary in shade of green from a dark olive to a lighter moss green. Some eggs also have small brown speckles against a green background, and many chicken aficionados think Isbar eggs are the most beautiful of any egg. Whether speckled or pure green, the Isbar eggs are as magical and exotic as the birds themselves. I love that when hatching Isbar eggs, you literally never know what color chicks you will get! They range in color in unique variations of black, grey, and white.
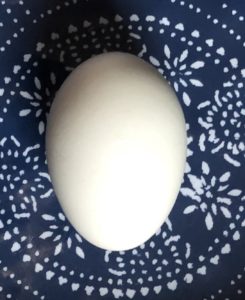
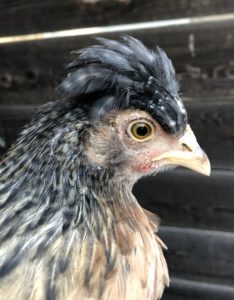
- Cream Legbars. Cream Legbars were first introduced at the London Dairy Show in 1947 and received a written standard by the Poultry Club of Great Britain in 1958. Legbars grew in popularity to fill a niche market in the British egg industry for pastel sky blue eggs produced by free-range birds. Cream Legbars are medium-sized fowl that are known for their active foraging and ability to survive in a free-range environment. The females look like they are wearing little beret hats. I think they are just adorable!
Raising chickens involves some basic dedication: ensuring they have clean water, fresh food, and a clean coop. But the rewards are amazing: fresh eggs, beautiful feathered friends, insect pest control, and last but not least—chicken manure makes great compost for your garden. I highly recommend the keeping of chickens!
- French Marans. French Marans lay deep chocolate brown colored eggs, that when cracked open reveal a bright orange, yolk, bursting with vitamins, protein, and fats from its healthy lifestyle. Marans have the reputation for laying the best-tasting chicken egg in the world. (Perhaps, for these reasons, the author Ian Fleming identified Marans eggs as those most preferred by James Bond.) I raise ultra-rare Birchen Marans. My Marans are extremely docile and sweet.
-
When Your Chicks Have Hatched, 7 Easy Steps
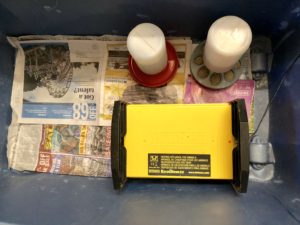
So your chicks have hatched! What next? You will need the following supplies: Large Rubbermaid Bin, at least 20”x 34”, without lid; Newspaper; Clip-on Brooder Heat Lamp OR Brinsea Ecoglow*; Chick Feeder; Chick Waterer. This is for hatches of 10-12 chicks or LESS.
1. Spread newspaper on bottom of bin. I like newspaper because it’s free and is easy to change. You should replace soiled newspaper at least every 2-3 days.
2. Firmly attach heat lamp to side of bin with lamp directly over inside of bin or place Ecoglow along the inside of the bin. Plug cord into electrical outlet. *As I mentioned in “8 Steps to Perfect Chick Hatching”, I prefer the Ecoglow because it is safer than the Lamp. As the chicks grow they will become much more active and adventurous, climbing and flying. They can potentially knock the heat lamp down. This happened to a friend of mine and she came home to find a fire in her coop. Not good! Also, the Ecoglow is much cheaper to run and will save you money in the long run, especially if you are planning multiple hatches. Another plus to the Ecoglow is that it has three adjustable heights: lowest for newborns, medium at around two weeks old, and the top height when they reach four weeks.
3. Fill the chick waterer and chick feeder and place near the Ecoglow. Newborn chicks need quick access to food and water. Later, you can move these further away to help maintain cleanliness. 24-36 hours after hatching, move the chicks from the incubator to the bin, ensuring they are beneath the heat lamp or Ecoglow. You may need to adjust the height of the heat lamp: if the chicks are snuggled tightly together and crying it may be too high. If they are scattered on the outskirts away from the heat lamp it may be too low. Happy chicks may peep and bustle about but will not cry. Make sure that chicks understand how to drink; you may need to dip their beaks gently into the water at first. Usually, once one or two chicks have mastered this, the others will imitate them.
4. Frequently check your chick’s bottom for “pasty butt”, a condition where poop builds up in a hard little clump on the feathers surrounding the chick’s vent and prevents further pooping. This can result in death. Gently remove the poop clump using a soft cloth and some petroleum jelly or mineral oil.
5. Keep chicks in the bin for 4-6 weeks, at least until the feathers covering their undersides have come in, before moving them to a bigger coop.