Farm Life
Information and anecdotes about living on a farm
-
When Your Chicks Have Hatched, 7 Easy Steps
So your chicks have hatched! What next? You will need the following supplies: Large Rubbermaid Bin, at least 20”x 34”, without lid; Newspaper; Clip-on Brooder Heat Lamp OR Brinsea Ecoglow*; Chick Feeder; Chick Waterer. This is for hatches of 10-12 chicks or LESS.
1. Spread newspaper on bottom of bin. I like newspaper because it’s free and is easy to change. You should replace soiled newspaper at least every 2-3 days.
2. Firmly attach heat lamp to side of bin with lamp directly over inside of bin or place Ecoglow along the inside of the bin. Plug cord into electrical outlet. *As I mentioned in “8 Steps to Perfect Chick Hatching”, I prefer the Ecoglow because it is safer than the Lamp. As the chicks grow they will become much more active and adventurous, climbing and flying. They can potentially knock the heat lamp down. This happened to a friend of mine and she came home to find a fire in her coop. Not good! Also, the Ecoglow is much cheaper to run and will save you money in the long run, especially if you are planning multiple hatches. Another plus to the Ecoglow is that it has three adjustable heights: lowest for newborns, medium at around two weeks old, and the top height when they reach four weeks.
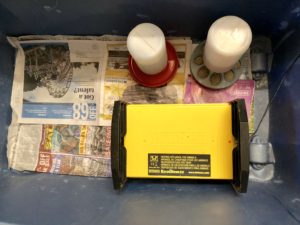
3. Fill the chick waterer and chick feeder and place near the Ecoglow. Newborn chicks need quick access to food and water. Later, you can move these further away to help maintain cleanliness. 24-36 hours after hatching, move the chicks from the incubator to the bin, ensuring they are beneath the heat lamp or Ecoglow. You may need to adjust the height of the heat lamp: if the chicks are snuggled tightly together and crying it may be too high. If they are scattered on the outskirts away from the heat lamp it may be too low. Happy chicks may peep and bustle about but will not cry. Make sure that chicks understand how to drink; you may need to dip their beaks gently into the water at first. Usually, once one or two chicks have mastered this, the others will imitate them.
4. Frequently check your chick’s bottom for “pasty butt”, a condition where poop builds up in a hard little clump on the feathers surrounding the chick’s vent and prevents further pooping. This can result in death. Gently remove the poop clump using a soft cloth and some petroleum jelly or mineral oil.
5. Keep chicks in the bin for 4-6 weeks, at least until the feathers covering their undersides have come in, before moving them to a bigger coop.
-
Life in the Country

“It’s your road and yours alone. Others may walk it with you, but no one can walk it for you.” This quote compelled me to write about my life on a dirt road in the California countryside.
When you live in the country on a dirt road you will never have a clean car. You will wash it to no avail, as the thick clouds of dust created when you drive on the road will quickly cover your vehicle in a fine gray layer. The dust will waft from the road into your house each time you open a window or door, so that your house can never be kept clean either, no matter how much you dust and sweep.
When you live in the country on a dirt road, you will dread the heavy rains, because you know it will mean a dance with death as you navigate your vehicle along the long slippery stretch hoping you don’t slide into the cliff wall, or worse yet, skid over the other side that plunges seventy-five feet below.
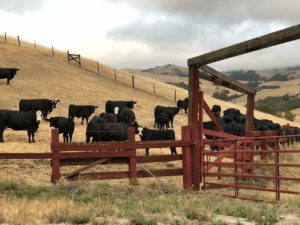
When you live in the country on a dirt road, you learn to watch for sinkholes in the road that start as big around as a man’s arm and suddenly become large enough to swallow your car. You will pass dozens of black cattle peppering the hillside and filling the silence with their gentle mooing. Sometimes one will squeeze through the fence and you will spot it trotting nonchalantly along the road until the ranch hands catch it and return it to the fenced in pasture.
When you live in the country on a dirt road, sometimes you will see a roadrunner darting quickly across or a tarantula crawling slowly along. You will learn the difference between rattlesnakes and bull snakes and learn to set the good black and white striped king snakes free when they become trapped in your garden’s protective netting. You will learn to recognize the ubiquitous poison oak and to avoid touching it lest you break out in the familiar horrible, itchy rash.
When you live in the country on a dirt road you will find that you can’t leave your chickens out past supper time or the Bobcats will get them. You will watch a team of wild pigs running fast near the creek in the quiet dusky evenings. You will hear a pack of coyotes howling just over the hill. You will lie on your back in the night and see every distant star in the galaxy and make a wish on one. You will see the Milky Way floating distantly like an ethereal plate and think about how tiny and inconspicuous you really are.

When you live in the country on a dirt road, it is almost two miles to your mailbox, but if you walk to it, you have time to notice the wildflowers: purple lupines, orange sticky monkey flowers, pink shooting stars. You will smell the fresh scent of eucalyptus after the rain. You will see blue jays, magpies and doves sitting on fence posts, quail scuttling along the road, and hawks and vultures swooping and circling rhythmically in the air. And sometimes you will see the hoof prints of deer, and then those of a mountain lion, and then both sets of prints will disappear.
When you live in the country on a dirt road, you wave at everyone you see walking by, and you smile because people are friendly and so are you. Sometimes you stop to chat with a neighbor who lives further down the road. And sometimes you see people you have hiked with in the past, and they will invite you to share a bottle of wine.
When you live in the country on a dirt road, life is good and it is simple. And sometimes, that is all you need.

-
Eight Easy Steps To Perfect Chick Hatching
I started out hatching and raising chickens, without any experience, and so can you! Follow my 8 easy steps:
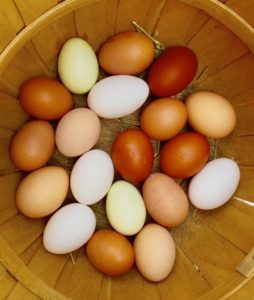
- Make sure you start with fresh, healthy, fertilized eggs.Discard any that are cracked or have any odor. Do not use any eggs older than two weeks.
- Get a good incubator. In my opinion Brinsea is the best for people starting out. I started out with the Brinsea Mini Advance and then moved up to a Brinsea Octagon Advance because it holds more eggs than the Mini and it is easier to monitor humidity levels than the Mini.
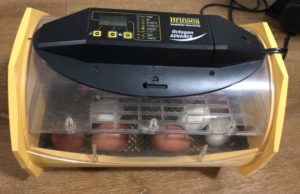
- Set the temperature between 99.4 -99.6 degrees F.
- Make sure that from day one through day twenty your humidity is consistently between 40-50%. I add water daily to my Brinsea incubator to ensure consistent humidity at this level.
- Ensure that the eggs are being rotated regularly, just as the mother hen would do herself. Brinsea ensures that this occurs do you don’t have to worry about it.
- On day 19, stop the rotation on your device (on the Octagon just remove the cradle) so that the eggs remain stable and remove any brackets holding the eggs in place
- On day 21, add enough water to get humidity levels to 65%.This will enable the chicks to peck out of their shell.
- This is the hardest but most important step. Do not take the cover off your incubator until nearly all eggs have hatched. This may take up to three days! I learned the hard way. If you take the cover off, even briefly, the change in humidity can literally shrink wrap all chicks in eggs in the process of hatching and increase their mortality rate substantially. Tempting as it may be, leave them alone! Don’t worry about getting them food and water right away; for up to 72 hours after they hatch, baby chicks are still ingesting their yolk sacs. This provides them all the nourishment they need.
Not all of your eggs may hatch, some may start to pip and then stop. There is usually a good reason they are not strong enough to survive, it is normal to not have a 100% hatch rate. After 24- 36 hours from the first chick hatch you may transfer the chicks to their next home: either the Brinsea Ecoglow Brooder or beneath a 250 Watt Red Heat Lamp. I started with the red heat lamp and switched to the Ecoglow brooder because A. it is cheaper to maintain, and B. it is much safer. I will discuss this more in “When Your Chicks have Hatched”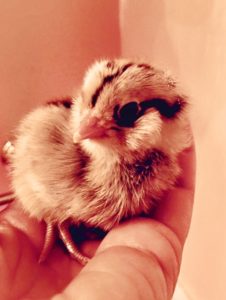
- Make sure you start with fresh, healthy, fertilized eggs.Discard any that are cracked or have any odor. Do not use any eggs older than two weeks.
-
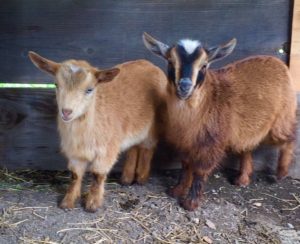
Farm Life in the Monterey Countryside in June


It’s life on the farm as usual. A bluebelly lizard is performing push-ups on the woodpile. He looks at me as if to assess my reaction. My goats, Anushka and Aliyah, are grazing nearby, chewing dead leaves and nibbling the moss on the fence posts. Harold, the rooster, stands nearby, and at times dances over to me, shaking his tail feathers. We have a love/hate relationship, Harold and I. He is either attacking me or flirting with me. He lives with Anushka and Aliyah in the little goat house and I believe he thinks he is a goat. Anushka and Aliyah love to eat, and unfortunately, are starting to eat their goat house just as Hansel & Gretel ate their gingerbread house in the fairy tale. Wildflowers are starting to bloom: pink shooting stars, deep purple lupines, and wild yellow jonquils are scattered over the hillside. Baby quails totter after their parents, who seem to cry out “Be careful! Be careful!” Hopefully, your weekend is filled with much peacefulness and happiness!
